
Manicotti is the kind of pasta you make when you want dinner to feel special. It’s warm, cheesy, and baked until bubbling, with tender pasta tubes holding a creamy filling and plenty of sauce. Even though it looks impressive, manicotti is more approachable than it seems—especially once you understand a few simple steps that make stuffing and baking easy. The beauty of this classic is how flexible it is: you can keep it traditional with ricotta and herbs, add spinach for color, or include meat for a heartier twist. Manicotti is also a dish that invites planning ahead, which makes it perfect for family dinners, holidays, or anytime you want leftovers that reheat beautifully. In this Second Pasta guide, we’ll break down how to build a great manicotti dish, how to work with the shells, and how to make every bite creamy and satisfying.
What Manicotti Is and Why It Works
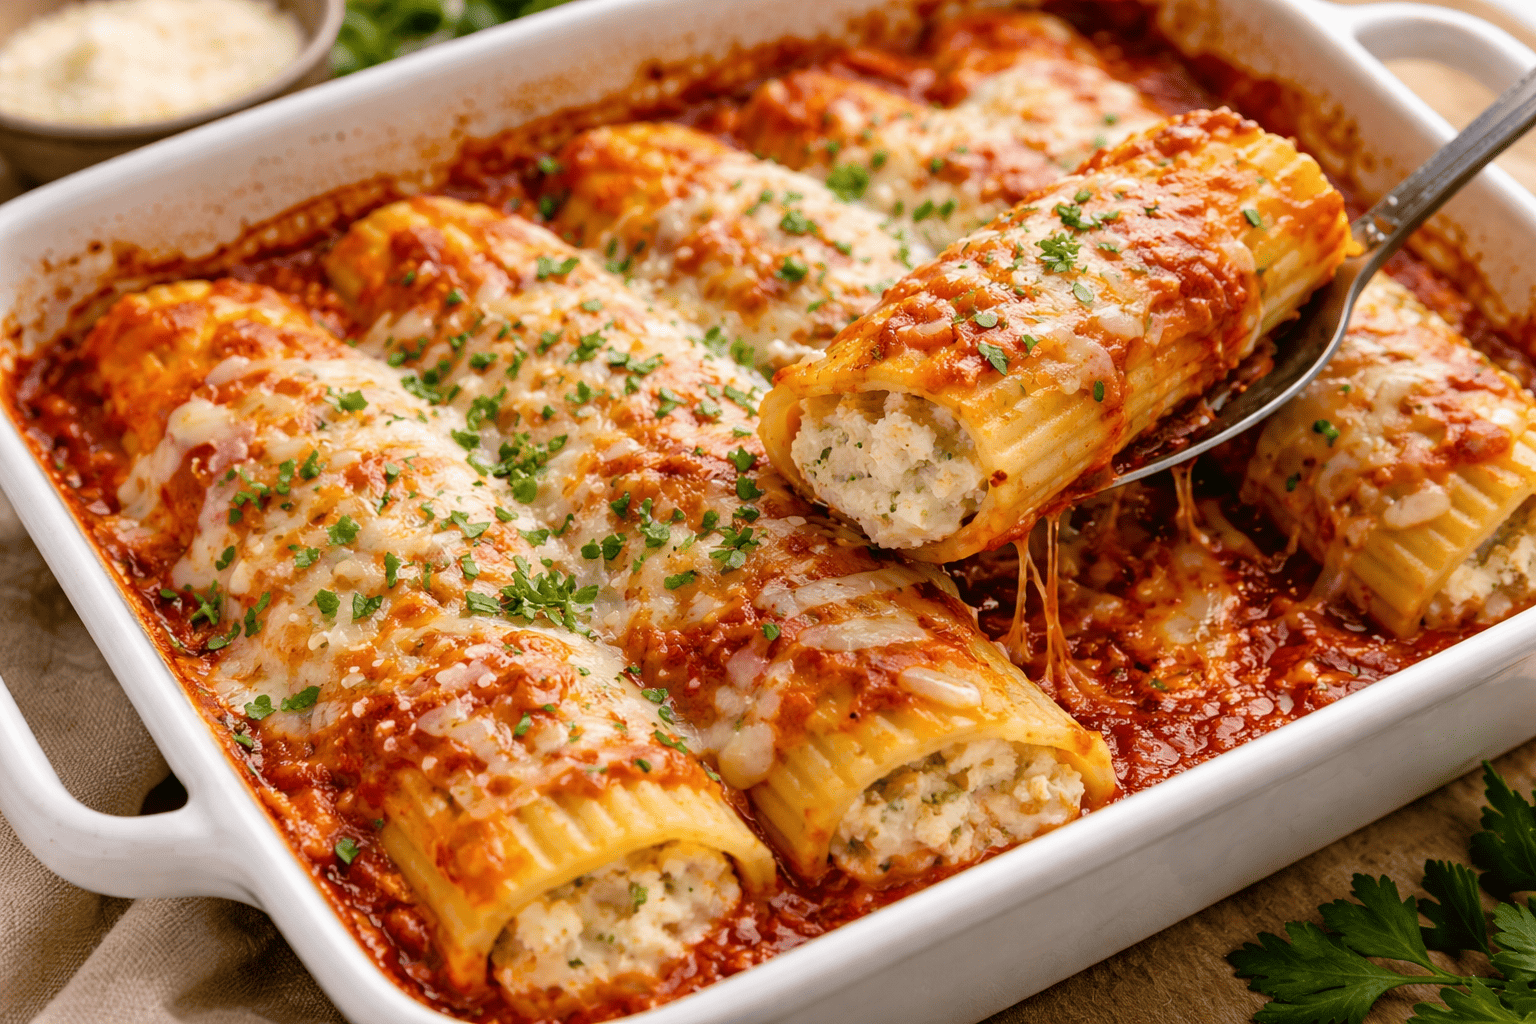
Manicotti is a baked pasta made with large tubes—manicotti shells—stuffed with a rich filling, covered in sauce, and baked until everything melds together. The tube shape is the magic: it creates a perfect ratio of pasta, filling, and sauce in every serving. Unlike casseroles where ingredients can blend into one layer, manicotti keeps its structure, so you get distinct pockets of creamy filling surrounded by tender pasta and saucy edges.
Because it’s baked, manicotti also develops those irresistible textures: creamy in the center, saucy around the edges, and lightly browned cheese on top.
Manicotti Shells: How to Prep Them Without Stress
Working with manicotti shells is the step that makes people nervous, but it’s simple once you know the goal: soften them enough to handle, but not so much that they tear.
A reliable method:
- Boil shells just until pliable (often a couple minutes less than “fully cooked”).
- Drain gently and lay them out on a tray so they don’t stick.
- Let them cool slightly before stuffing.
Another option is using “no-boil” shells if you find them. These soften as they bake, but they require a bit more sauce to ensure the pasta cooks through.
No matter which you choose, the key is moisture: enough sauce to bake the shells tender, but not so much that the dish turns watery.
The Filling: Classic Cheese Manicotti and Beyond
The heart of the dish is the filling, and cheese manicotti is the classic for a reason. A creamy ricotta base with herbs and cheese tastes rich, comforting, and familiar. A simple filling structure includes:
- Ricotta (for creaminess)
- Mozzarella (for stretch)
- Parmesan (for salty depth)
- Egg (to bind and give structure)
- Herbs (parsley, basil, or a little oregano)
- Salt and pepper
If you want variation, you can:
- Fold in spinach (squeezed very dry)
- Add sautéed mushrooms
- Mix in cooked sausage or ground beef
- Add lemon zest for brightness in a lighter version
Whatever direction you go, aim for a filling that is creamy but thick enough to hold its shape inside the shell.
Stuffed Manicotti: The Easiest Way to Fill Without Mess
Stuffed manicotti looks fancy, but the secret is using the right tool. Instead of trying to spoon filling into each tube, use a piping approach:
- Put filling into a zip-top bag, snip the corner, and pipe it in.
- Or use a piping bag if you have one.
This method is faster, cleaner, and less likely to tear shells. Fill each tube evenly, and don’t overpack—too much filling can cause shells to split while baking.
Sauce and Layering: How to Keep It Creamy, Not Dry
The sauce is what turns stuffed tubes into a finished baked meal. A classic marinara works beautifully, and a slightly creamy tomato sauce can feel extra luxurious.
A simple layering method:
- Spread sauce on the bottom of the baking dish (prevents sticking and dries edges).
- Arrange filled shells in a single layer.
- Spoon more sauce over the top, making sure shells are coated.
- Add cheese on top for browning and stretch.
- Cover with foil to bake through, then uncover to brown.
Covering for the first part of baking traps steam so the shells cook fully and the filling stays moist.
Make-Ahead Tips and Leftovers
Manicotti is a make-ahead dream. You can assemble it, cover it, and refrigerate it for the next day. When baking from cold, you’ll usually need a little extra time so the center heats through.
Leftovers reheat well because the filling holds moisture. If you want the top cheese to stay nice, reheat uncovered for part of the time so it doesn’t turn overly soft.
Manicotti and Ziti for Comfort-Food Rotations
If manicotti is the “stuffed and special” baked pasta, ziti is its easygoing cousin. Both are comforting, cheesy, and perfect for feeding a group. The difference is structure: manicotti is neatly portioned tubes with a creamy center, while ziti is more scoopable and casserole-like. They also pair well in meal planning: make one batch of marinara and use it for both—baked ziti one night when you want simple, and manicotti another night when you want something that feels like an occasion.
Conclusion
Manicotti is a comforting classic that looks impressive but comes together through a few straightforward steps: prep the manicotti shells, mix a creamy filling, pipe and assemble, then bake until bubbling and golden. Whether you keep it traditional as cheese manicotti or customize your manicottirecipe with spinach, herbs, or meat, the result is always the same kind of cozy: tender pasta, rich filling, and saucy, cheesy goodness in every bite. And when you want another crowd-friendly baked option, ziti is the perfect companion in your pasta rotation. With manicotti, you’re not just making dinner—you’re making a dish that feels like home.